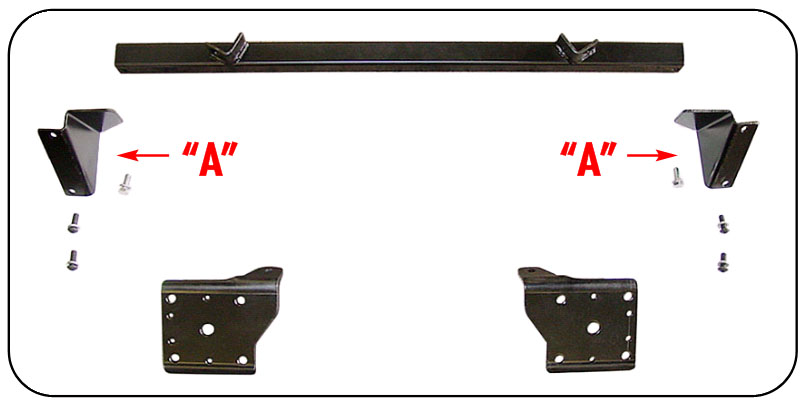
Part #RSRK6774
1.) Jack vehicle up and support rear sub frame with jack stands.
2.) Remove shocks and rear bump stops from chassis.
3.) Mount brackets marked “A” onto original bump stop holes using the supplied button head bolts. Note: We have found some variations in these mounting holes, you may need to fit the bracket to the frame from the bottom. Our brackets have 4.25” bolt centers, some frames have 3.750” bolt centers and some have no holes and will be weld-ins.
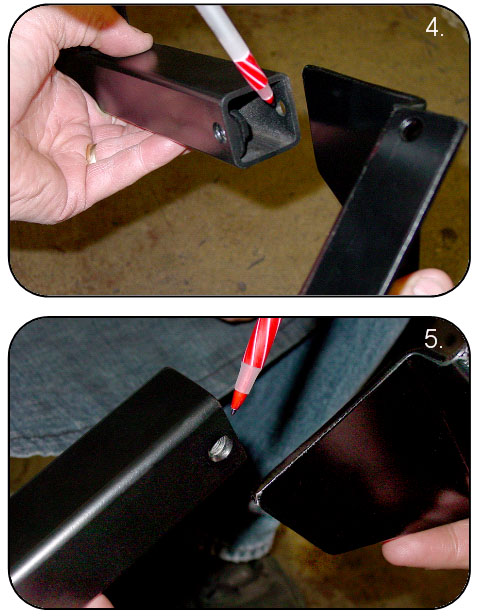
4.) Position shock crossmember underneath mounting brackets and mark the mounting brackets. Due to vehicle variations, you may need need to drill your own holes with a 3/8” drill bit!
5.) Once the holes are drilled, mount the shock crossmember on top of the mounting brackets and secure it with supplied 3/8” – 24 bolt.
6.) Remove lower shock studs from original tie plates.
7.) Remove original tie plates. Make sure there is no load on the leaf springs.
8.) Install NEW! lower tie plates with shock stud mounting hole facing the inside front of vehicle! You must reuse your original shock studs.
9.) Install shocks and enjoy.


What sway bar do you recommend if I plan on installing the shock relocator kit. My Addco bar will not work due to it hitting the shocks
Where does this relocate the shocks to ? (I know they will be inboard of the springs)
Dose it mount the shock in front of the Housing or behind the Housing ? To you have any pictures of the final install ?
Thanks
Brian
It mounts them inboard and you can choose whether you want them in front of the rearend or behind the rearend. Standard is behind the rearend.
Does this mount work with the factory radial arms (tractionbars) on a 67 Firebird?
Cheers
Dave
We dont see many vehicles as mentioned. Please email us at info@performanceonline.com with pictures so we can verify your question.