This is the first item that you can bolt on and have instant, noticeable difference in the handling of your truck.
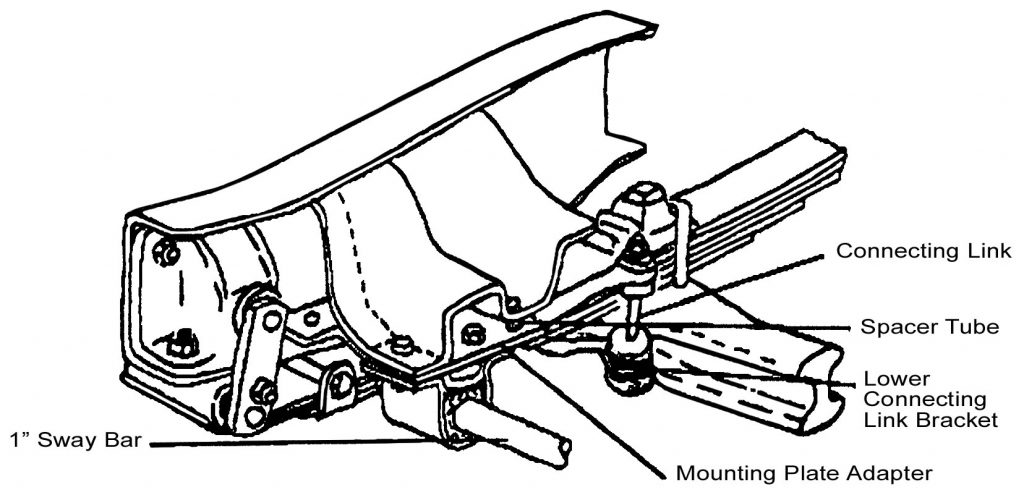
- Mounting holes are already in the front crossmember, no new holes need to be drilled, they were used for factory panel truck sway bars.
- Open all packages and lay the parts out on the floor, to simulate how they will be applied to your truck.
- Parts List:
A. 1 (ea.) 1” Sway bar
B. 2 (sets) Poly urethane bushings with clamps
C. 2 (ea.) Sway bar mounting plate adapter
D. 4 (ea.) 3/8 x 1 1/4” Mounting bolts
E. 2 (ea.) 3/8 x 1 3/4” Inner mounting bolt, with spacer
F. 2 (ea.) Lower connecting link bracket
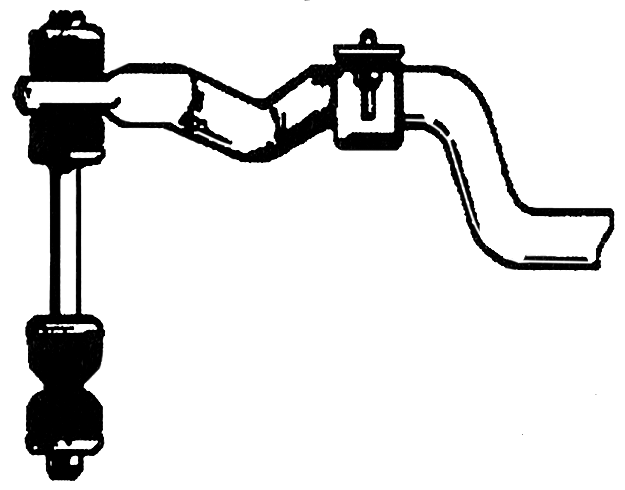
G. 2 (ea.) Sway bar connecting links, poly urethane
STEPS: Read these instructions carefully!
- Mount lower connecting link bar, under the inside front U-bolt nut. (Using the smaller of the two holes.)
- Mount the mounting plate adapter to the frame, using the spacer sleeve on the furthest rear hole in the crossmember.
- Install the bushings and clamps on the sway bar. Now swing the bar and brackets to the frame and check alignment.
- Mount everything in place by hand, to insure proper fit and alignment.
(Suggestion: For appearance and to avoid the bolt below the axle, mount connecting link bolts with the threads pointing up.)


How hard is it to put on .how much dose it help the stock ftount end
Our front sway bar is quite easy to install. Depending on how you drive, it will help quite a bit with body roll and overall handling characteristics.